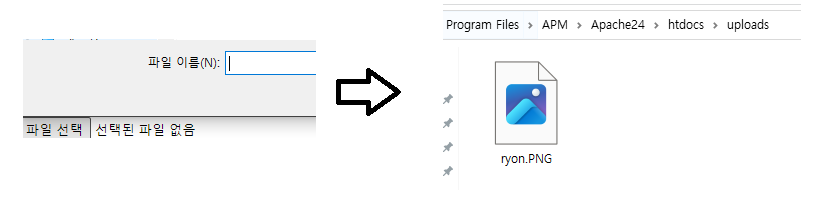
<파일업로드>
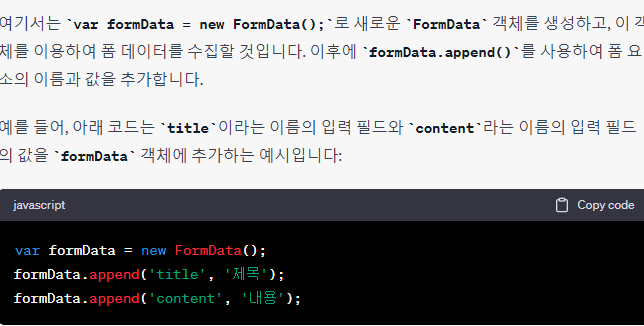
- var formData = new FormData();: FormData 객체를 생성합니다. 이 객체는 HTML 폼 데이터를 쉽게 처리할 수 있게 해줍니다.
- formData.append('title', $('input[name=title]').val());: FormData 객체에 "title"이라는 이름으로 폼의 제목(input 요소) 값을 추가
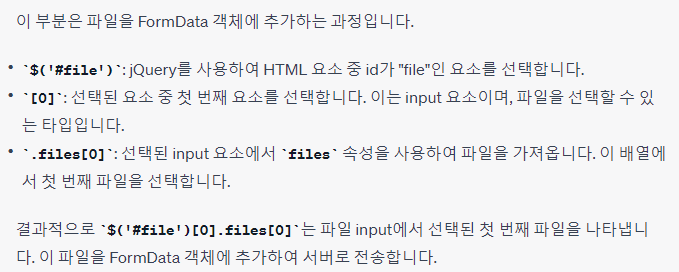
- $('#file')[0].files[0]는 파일 input에서 선택된 파일을 가져오는 jQuery 코드
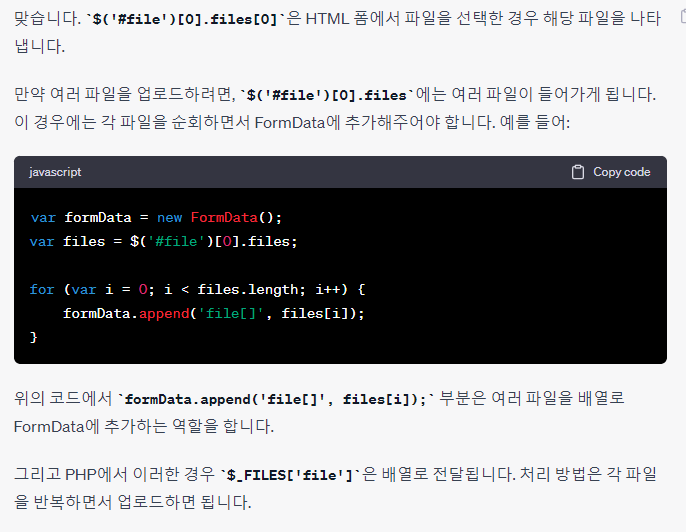
- ▼ ▼ 만약 파일이 여러개라면? ▼ ▼
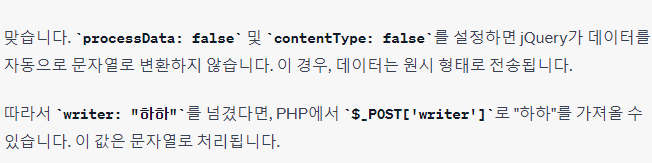
- processData: false: 이 옵션을 설정하면 jQuery는 데이터를 문자열로 변환하지 않습니다. 일반적으로 이 값을 false로 설정하여 FormData 객체나 파일 업로드와 같은 복잡한 데이터를 서버에 전송할 때 사용합니다. 만약 이 값을 true로 설정하면 데이터가 자동으로 문자열로 변환됩니다.
- contentType: false: 이 옵션을 설정하면 jQuery가 Content-Type 헤더를 자동으로 설정하지 않습니다. FormData 객체를 사용할 때, Content-Type은 multipart/form-data여야 하므로 이 값을 false로 설정하여 jQuery가 Content-Type을 설정하지 않도록 합니다.
- 의문점1: 그럼 파일빼고 나머지 문자열데이터는 어케되지..?
<php파일>
- if(isset($_FILES['file']) && $_FILES['file']['error'] == UPLOAD_ERR_OK): 이 부분은 클라이언트로부터 파일이 업로드되었는지 확인합니다. $_FILES['file']은 <input type="file" name="file">에서 업로드된 파일을 나타냅니다. UPLOAD_ERR_OK는 파일 업로드가 정상적으로 완료되었음을 나타내는 PHP 상수
- $uploads_dir = 'uploads/';: 업로드된 파일을 저장할 디렉터리를 지정합니다. 여기서는 uploads/ 디렉터리를 사용합니다. 이 디렉터리는 현재 PHP 파일이 위치한 디렉터리 내에 존재
- $file_name = $_FILES['file']['name'];: 업로드된 파일의 원래 이름을 가져옵니다.
- $file_tmp = $_FILES['file']['tmp_name'];: 업로드된 파일이 임시로 저장된 경로를 가져옵니다. 파일이 임시로 저장되는 이유는 업로드 과정 중에 파일을 임시로 저장해두고 나중에 이를 원하는 위치로 옮기기 위함입니다.
- move_uploaded_file($file_tmp, $uploads_dir . $file_name); 코드는 파일 업로드를 처리하는 부분입니다.
- $file_tmp은 업로드된 파일의 임시 저장 경로입니다.
- $uploads_dir . $file_name은 업로드된 파일이 최종적으로 저장될 경로와 파일 이름을 나타냅니다.
- move_uploaded_file() 함수는 임시 파일을 최종 저장 위치로 옮기는 역할을 합니다.
- 여기서 간단히 설명하면:
- $file_path = $uploads_dir . $file_name;: 파일이 옮겨진 경로를 변수 $file_path에 저장합니다.
- else: 파일이 업로드되지 않은 경우에 해당하는 부분입니다. 이 경우 $file_path를 null로 설정합니다.
<!doctype html>
<html lang="en">
<head>
<meta charset="UTF-8">
<meta name="Generator" content="EditPlus®">
<meta name="Author" content="">
<meta name="Keywords" content="">
<meta name="Description" content="">
<title>Document</title>
<script src="//code.jquery.com/jquery-3.3.1.min.js"></script>
</head>
<body>
<h1>글 작성페이지</h1>
<div>
<input type="text" name="title" placeholder="제목을 입력하세요"><br>
<input type="text" name="content" placeholder="내용을 입력하세요" style="width:300px; height:300px"><br>
<input type="file" name="file" id="file"><br>
<button type="button" id="btn">글 작성</button>
<?
session_start();
$username = $_SESSION['login_Id'];
?>
<script>
$('#btn').click(function() {
var formData = new FormData();
formData.append('title', $('input[name=title]').val());
formData.append('content', $('input[name=content]').val());
formData.append('writer', "<?=$username?>");
formData.append('file', $('#file')[0].files[0]);
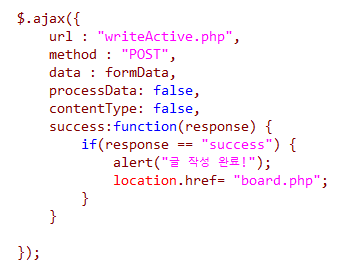
$.ajax({
url : "writeActive.php",
method : "POST",
data : formData,
processData: false,
contentType: false,
success:function(response) {
if(response == "success") {
alert("글 작성 완료!");
location.href= "board.php";
}
}
});
});
</script>
</div>
</body>
</html><?php
$servername = "localhost";
$username = "root";
$password = "1234";
$dbname = "practice";
$conn = new mysqli($servername, $username, $password, $dbname);
if($conn->connect_error) {
die("연결 실패: " . $conn->connect_error);
}
$title = $_POST['title'];
$content = $_POST['content'];
$writer = $_POST['writer'];
// 파일을 업로드한 경우에만 처리합니다.
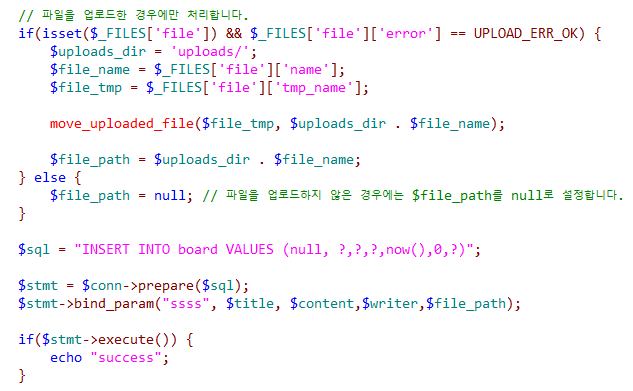
if(isset($_FILES['file']) && $_FILES['file']['error'] == UPLOAD_ERR_OK) {
$uploads_dir = 'uploads/';
$file_name = $_FILES['file']['name'];
$file_tmp = $_FILES['file']['tmp_name'];
move_uploaded_file($file_tmp, $uploads_dir . $file_name);
$file_path = $uploads_dir . $file_name;
} else {
$file_path = null; // 파일을 업로드하지 않은 경우에는 $file_path를 null로 설정합니다.
}
$sql = "INSERT INTO board VALUES (null, ?,?,?,now(),0,?)";
$stmt = $conn->prepare($sql);
$stmt->bind_param("ssss", $title, $content,$writer,$file_path);
if($stmt->execute()) {
echo "success";
}
?><파일다운>
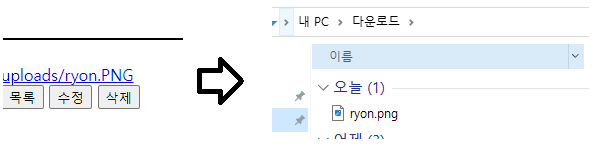
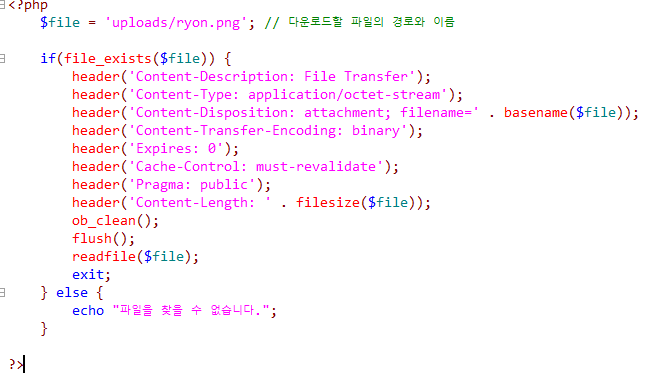
- $file 변수에 다운로드할 파일의 경로와 이름을 설정합니다. 예제에서는 uploads/ryon.png로 설정되어 있습니다.
- file_exists($file) 함수는 해당 경로에 파일이 존재하는지 확인합니다.
- 만약 파일이 존재한다면, 다운로드를 위한 헤더 정보를 설정합니다.
- Content-Description: 파일 전송에 대한 설명
- Content-Type: 파일의 MIME 타입을 설정합니다. 여기서는 application/octet-stream으로 설정하여 이진 파일을 의미합니다.
- Content-Disposition: 다운로드할 때 사용될 파일의 이름을 설정합니다.
- Content-Transfer-Encoding: 전송 인코딩 방식을 설정합니다. 이진 파일은 binary로 설정합니다.
- Expires, Cache-Control, Pragma: 캐싱과 관련된 헤더 설정입니다.
- Content-Length: 전송될 파일의 크기를 설정합니다.
- ob_clean()과 flush() 함수를 호출하여 출력 버퍼를 비우고 출력을 강제로 전송합니다.
- readfile($file) 함수를 사용하여 파일을 읽어 출력합니다.
- 마지막으로 exit로 스크립트 실행을 종료합니다.
<!doctype html>
<html lang="en">
 <head>
  <meta charset="UTF-8">
  <meta name="Generator" content="EditPlus®">
  <meta name="Author" content="">
  <meta name="Keywords" content="">
  <meta name="Description" content="">
  <title>Document</title>
  <style>
		.box {border: 2px solid black; margin-bottom: 20px;}
		.content {height:300px; width: 100%;  resize:none;}
		.span {margin-right: 20px;}
  </style>
  <script src="//code.jquery.com/jquery-3.3.1.min.js"></script>
 </head>
 <body>
	<h1>상세보기</h1>

	<?php
		session_start();
		$servername = "localhost";
		$username = "root";
		$password = "1234";
		$dbname = "practice";

		$conn = new mysqli($servername, $username, $password, $dbname);

		if($conn->connect_error) {
			die("연결 실패: " . $conn->connect_error);
		}

		$getNum = $_GET['num'];
		$getPageNum = $_GET['p'];
		$getPostNum = $_GET['num'];
		$getWriter = $_SESSION['login_Id'];

		echo "넘어온 페이지 번호: $getPostNum<br>";

		$sql = "SELECT * FROM board WHERE num = ?";
		$stmt = $conn->prepare($sql);
		$stmt->bind_param("i", $getPostNum);
		$stmt->execute();
		$result = $stmt->get_result();


		//한개씩 가져온다 여러개 가져오면 while만 붙이면됨!!
		if($list = $result->fetch_assoc()) {
			$title = $list['title'];
			$content = $list['content'];
			$writer = $list['writer'];
			$regdate = $list['regdate'];
			$viewCount = $list['viewCount'];
			$file = $list['file'];

		}

		//로그인유저와 글 작성자 맞는지 체크
		if($getWriter == $writer) {
			$chkWriterInfo = "true";
		}else {
			$chkWriterInfo = "false";
		}
		echo "getwriter:". $getWriter. "<br>";
		echo "$writer:" . $writer;
	?>

	<div>
		<div class="box">
			<p>
				<span class="span">제목 : <?=$title?></span>
				<span class="span">등록일 : <?=$regdate?></span>
				<span class="span">조회수 : <?=$viewCount?></span>
			</p>
		</div>
		<div>
			<textarea class="box content" readonly><?=$content?></textarea>
		</div>
		<div>
			<a href="downfileActive.php" id="filepath"><?=$file?></a>
			<button type="button" id="fileXbtn" style="display:none;">x</button>
		</div>
		<button type="button" id="list" style="text-align:right;">목록</button>
	<?
		if($chkWriterInfo == "true") {
	?>
			<button type="button" id="upBtn">수정</button>
			<button type="button" id="delBtn">삭제</button>
	<?
		}
	?>

		<script>
			$('#upBtn').click(function(){
				if($("#upBtn").text() == "수정") {
					$('.content').prop('readonly', false);
					$("#upBtn").text('등록하기');
					$('#fileXbtn').css("display","inline");
				}else if($("#upBtn").text() == "등록하기") {
					$.ajax({
						url: "updateActive.php",
						method : "get",
						data : {
							num : "<?=$getNum?>",
							content : $('.content').val()
						},
						success:function(rsps) {
							if(rsps == "success") {
								alert("수정완료");
								location.reload();
							}
						}
					});
				}
			});

			$('#delBtn').click(function(){
				$.ajax({
					url: "deleteActive.php",
					method : "get",
					data : {
						num : "<?=$getNum?>"
					},
					success:function(rsps) {
						if(rsps == "success") {
							alert("삭제완료");
							location.href = "board.php";
						}
					}
				});
			});

			//원래 페이지로 돌아가기(목록버튼)
			$('#list').click(function() {
				location.href ="board.php?p=<? echo $getPageNum?>";
			});
		</script>
	</div>

 </body>
</html>
<?php
$file = 'uploads/ryon.png'; // 다운로드할 파일의 경로와 이름
if(file_exists($file)) {
header('Content-Description: File Transfer');
header('Content-Type: application/octet-stream');
header('Content-Disposition: attachment; filename=' . basename($file));
header('Content-Transfer-Encoding: binary');
header('Expires: 0');
header('Cache-Control: must-revalidate');
header('Pragma: public');
header('Content-Length: ' . filesize($file));
ob_clean();
flush();
readfile($file);
exit;
} else {
echo "파일을 찾을 수 없습니다.";
}
?>'php > 개인공부' 카테고리의 다른 글
| 세션/session_start()/$_SESSION//session_destroy()// unset() (0) | 2023.10.31 |
|---|---|
| mysqli // php + insert (0) | 2023.10.31 |
| mysqli// select 한개만 조회 (0) | 2023.10.31 |
| mysqli// php + mysql연동// SELECT문 // $_SERVER['REMOTE_ADDR'] (0) | 2023.10.30 |
| <PDO>하다가 sqli로 공부 아직 미완성>php +mysql//SELECT문//for each//$_SERVER['REMOTE_ADDR']/ isset() (0) | 2023.10.30 |


